Table of Contents
Manage Checklists
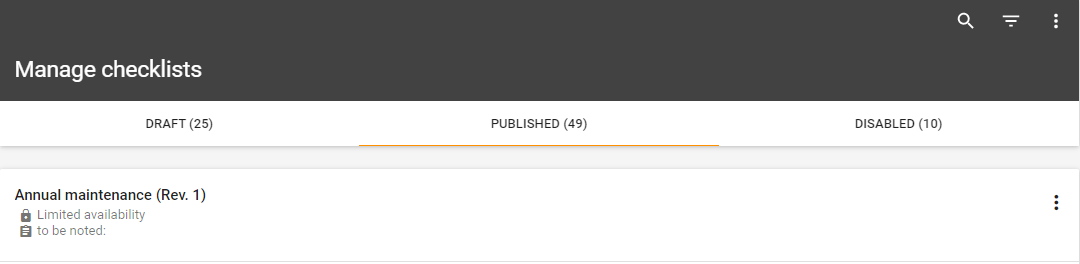
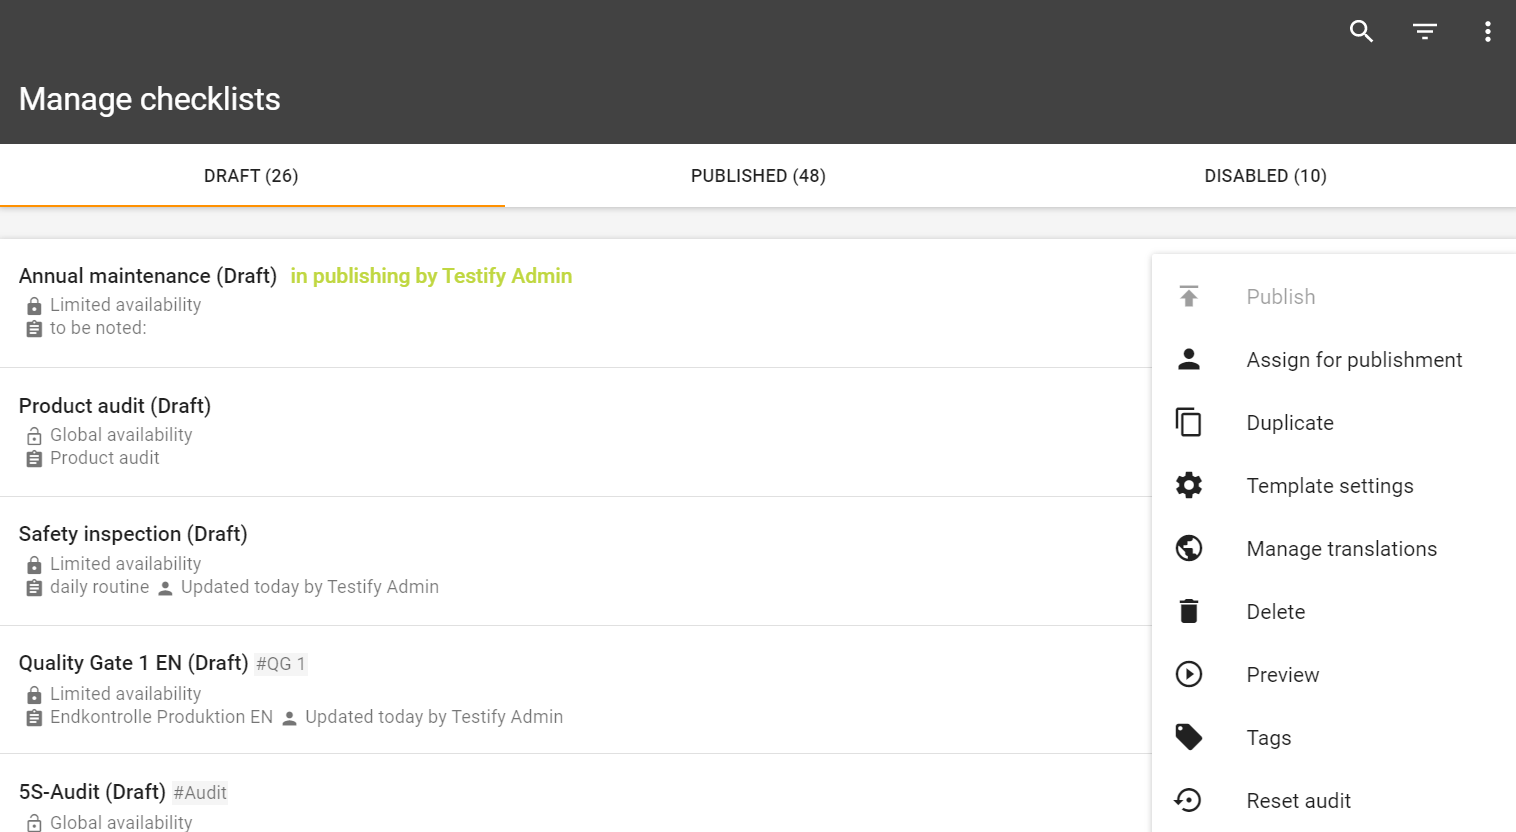
In the "Manage Checklists" section, checklist templates can be managed. All checklist templates are divided into the three categories “Draft“, “Published” and “Disabled”. In the right upper corner you can search for specific checklist templates by clicking on the magnifying glass. Right next to it you can set filters for test objects and test object types.
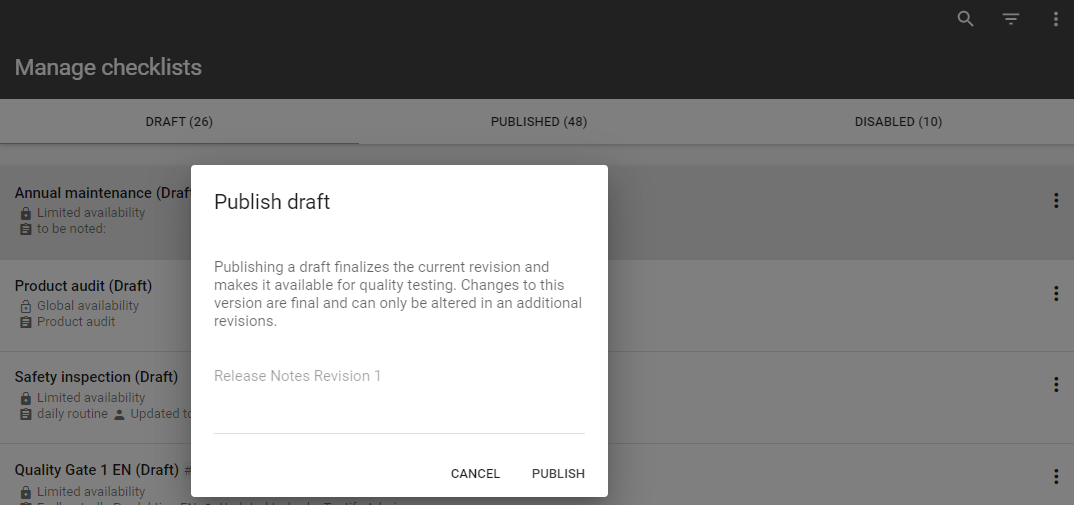
Draft: Drafts are checklist templates that are not published yet and can be adjusted. They are not visible nor can they be carried out by a user.
Published: Published checklist templates are all checklists, that can be carried out by a user.
Disabled: Disabled checklist templates are those checklists, that were published in the past. They can be reactivated and published anytime by a permitted user.

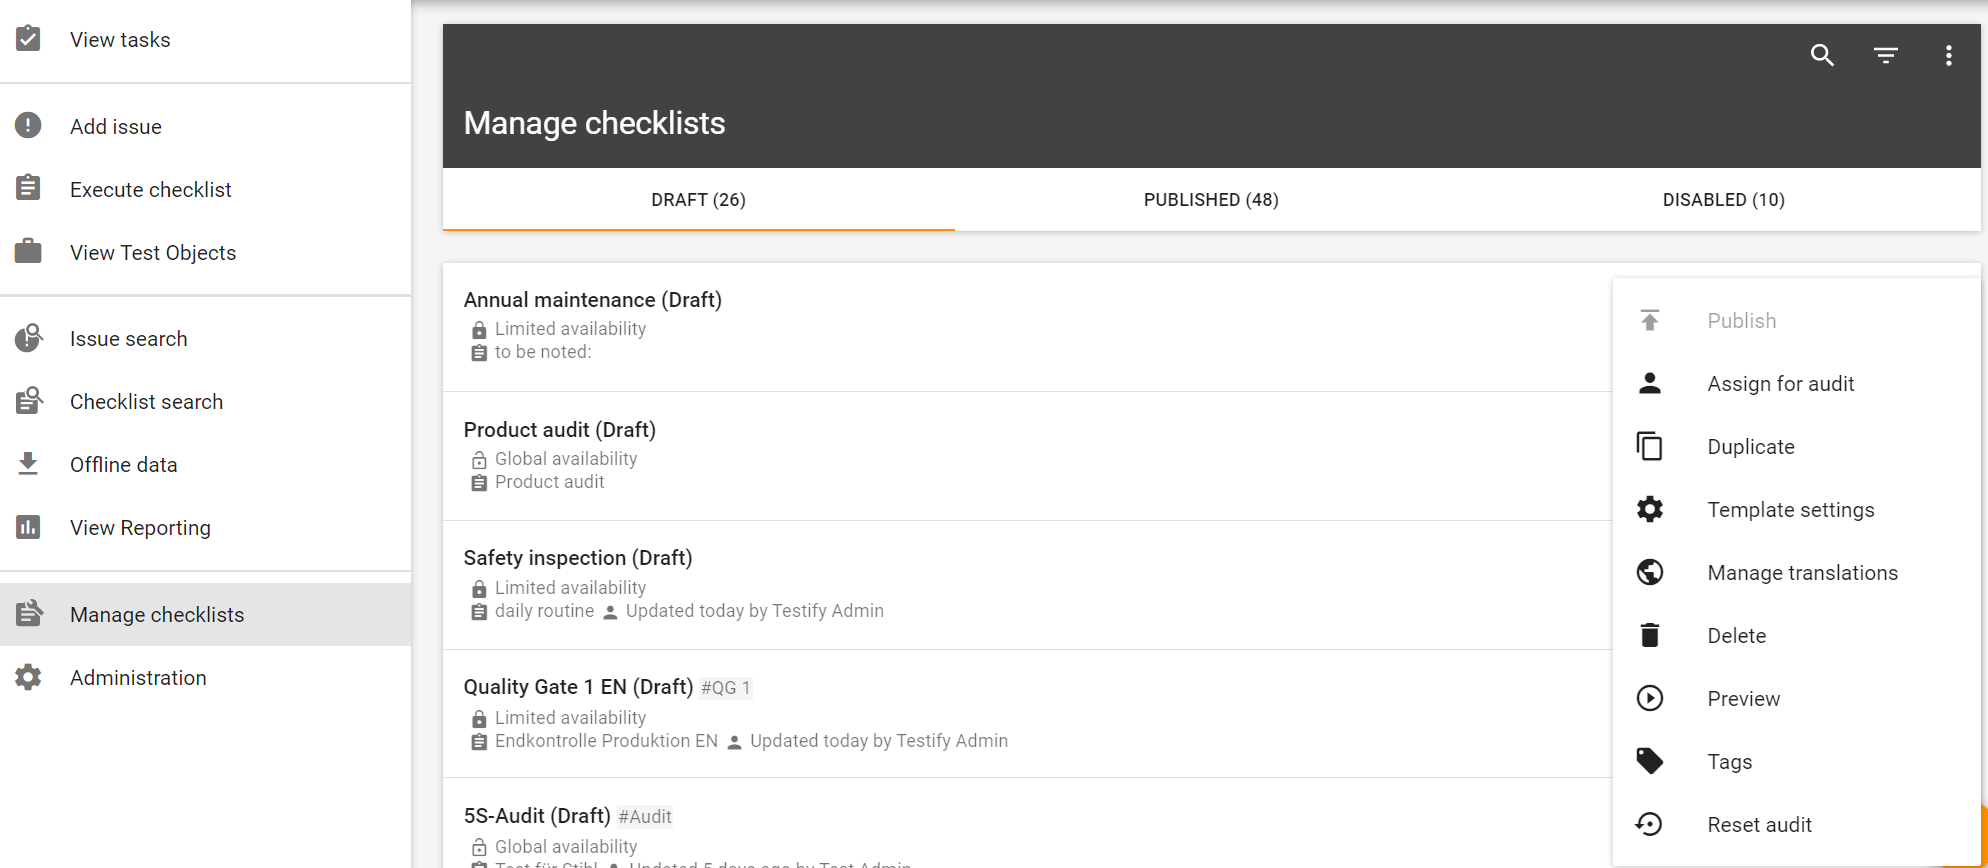
Checklist context menu
Depending on the section you find yourself in, different options are displayed when clicking on the context menu (the three dots) on the right hand side of the checklist:
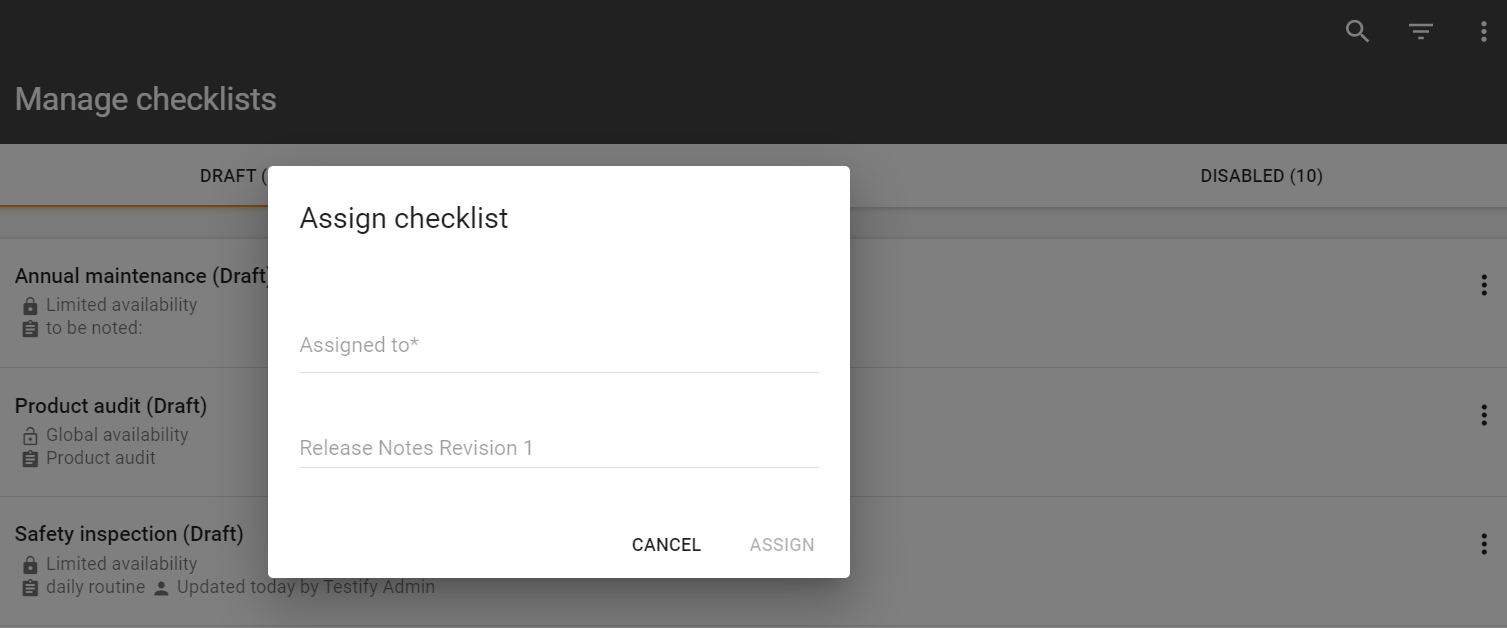
Publish - checklist templates in draft can be published here
Delete - checklist templates that are in draft can still be deleted here
Edit - checklists templates that are published can be edited and afterwards republished. By republishing, only the new version of the checklist will be executable
History - published checklist templates have a history which shows all former versions of the checklist
Disable - published checklist templates can be disabled if they are not relevant anymore
Enable - disabled checklist templates can be enabled again by this option
Duplicate - by clicking on this button the user is able to copy the checklist
Preview - gives a preview of how working with the checklist template would look in action
The other options are discussed in the following pages:

Manage checklists with ISO 9001:2015
This feature must first be set in the Company settings by the Testify Admin.
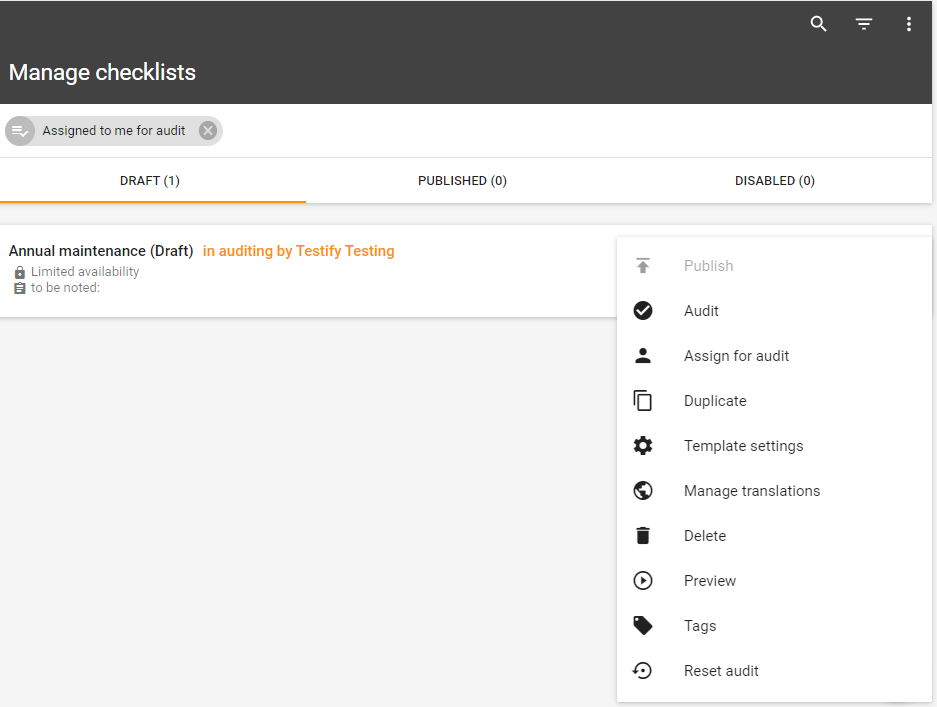
If this is activated, the selection options in the context menu adjust accordingly by the extensions "Assign for audit" and "Reset audit". The "Publish" item is grayed out until the checklist template has been released by third parties in draft mode.
Release process
In the audit process there are 3 roles, which have to be fulfilled by 2-3 persons (4-eyes or 6-eyes principle):
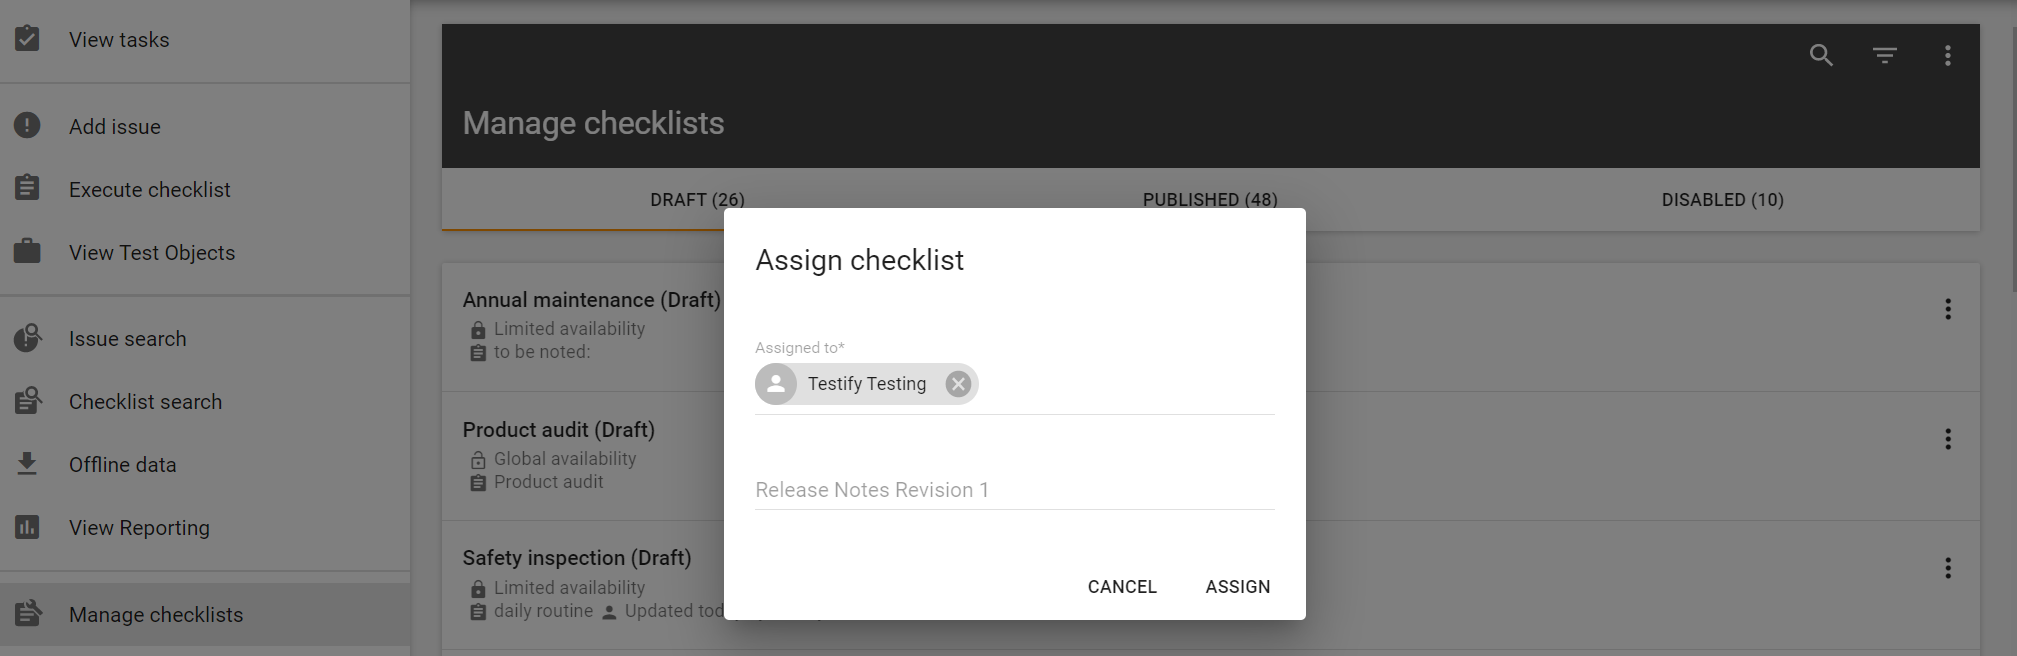
Creator: person who last created the checklist template. A creator can assign the checklist template to another user for auditing, but can neither audit nor publish it.
Auditor: can audit and publish a checklist template.
Publisher: can publish a checklist template
Process stages
Draft: Template is still being edited, but not yet assigned to another user for auditing
In auditing: template is assigned to a user for audit, but not yet audited
In publishing: Template is assigned to a user for publishing, but not yet published
Published: Checklist template is published
Audit process
First, a checklist template is created in draft mode. The person who last edited the checklist is the publisher.
Publisher opens the context menu → "Publish" button is disabled". Assign the checklist template to another person with the "Assign for audit" button active.
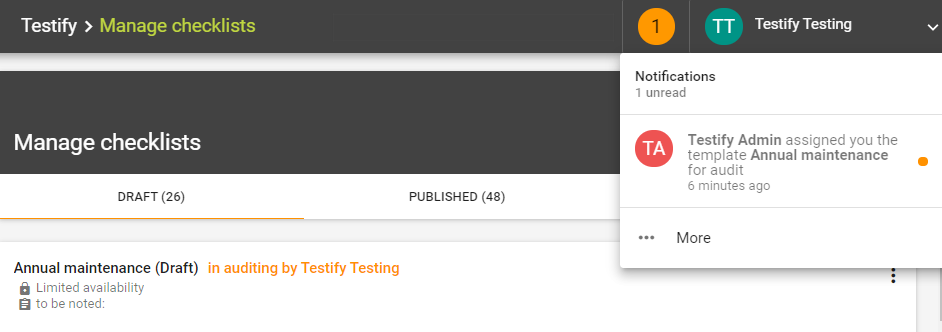
Checklist status new: "in auditing".
The assigned team member receives a notification that a new checklist template is to be reviewed. Clicking on the notification opens the overview of all checklist templates to be checked. It is also possible to filter "in publishing by".
After the checklist has been checked, the context menu in the overview can be used to select "Assign for publishment" and to specify a person who is to perform the final check (Auditor / Publisher).
The assigned team member receives a notification that a checklist template is to be reviewed for release. Clicking on the notification opens the overview of all checklist templates to be checked.
The Publisher can now perform the final check of the template and publish it as usual via the context menu.
Export and import of data
Inserting data is possible either directly in Testify by manual creation or by export/import. For more on export/import: Administering Testify
Example: Audit checklist templates
Step 1: Assign checklist for audit
Step 2: Checklist template is under audit
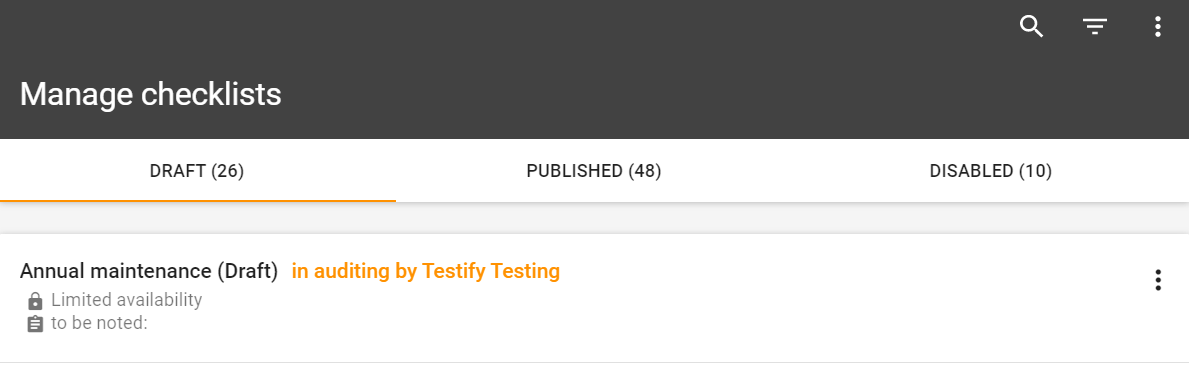
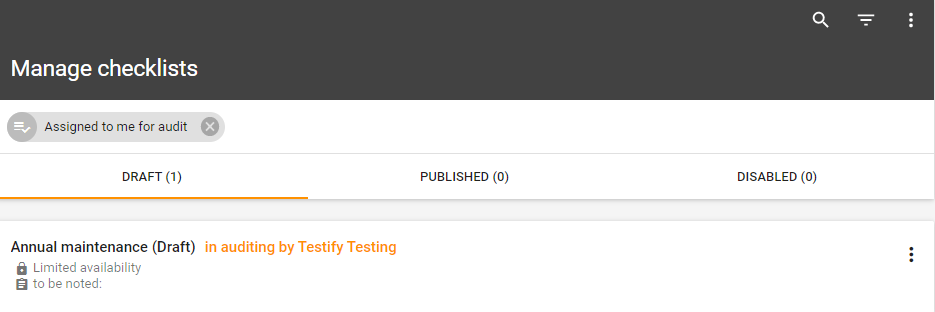
Step 3: The checklist template was assigned for audit
The "Assigned to me for audit" filter displays all checklist templates that are or were assigned to a person for audit.
Step 4: Check checklist template: Open and check the checklist template
Click on the checklist template and check the contents or adjust if necessary
Step 5: If the checklist template is in order, confirm with "Audit”

Step 6: Open and check the checklist template
Click on the checklist template and check the contents or adjust if necessary
Step 7: Confirm with "Assign for publishment”
If the checklist template is in order, confirm with "Assign for publishment”
Step 8: Assign for Publishment
The Checklist can now be either assigned to the same person as before (4-eyes principle) or to a third person (6-eyes principle)
Step 9: Final check of the checklist template
Click on the checklist template to check if everything is alright
Step 10: Publish

Step 11: The checklist template has now been published