Table of Contents
Under "Administration" in the workflow section the user can automate his Testify environment. Certain events can be defined which trigger actions when they take place. Workflows can be activated and deactivated.
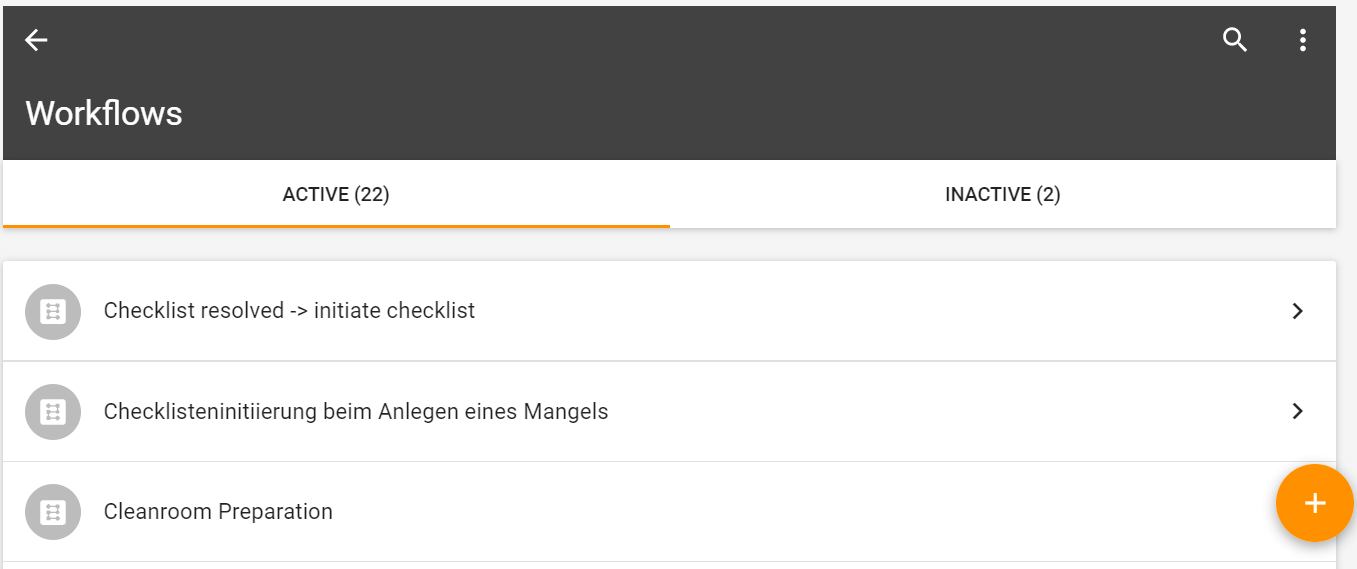
When adding a new Workflow the user has to define a title. The title should be meaningful so that you can already see in the menu which task the workflow fulfils. After defining a descriptive title, the triggering event and the action afterwards need to be defined. If necessary there can be multiple triggering events and actions added.
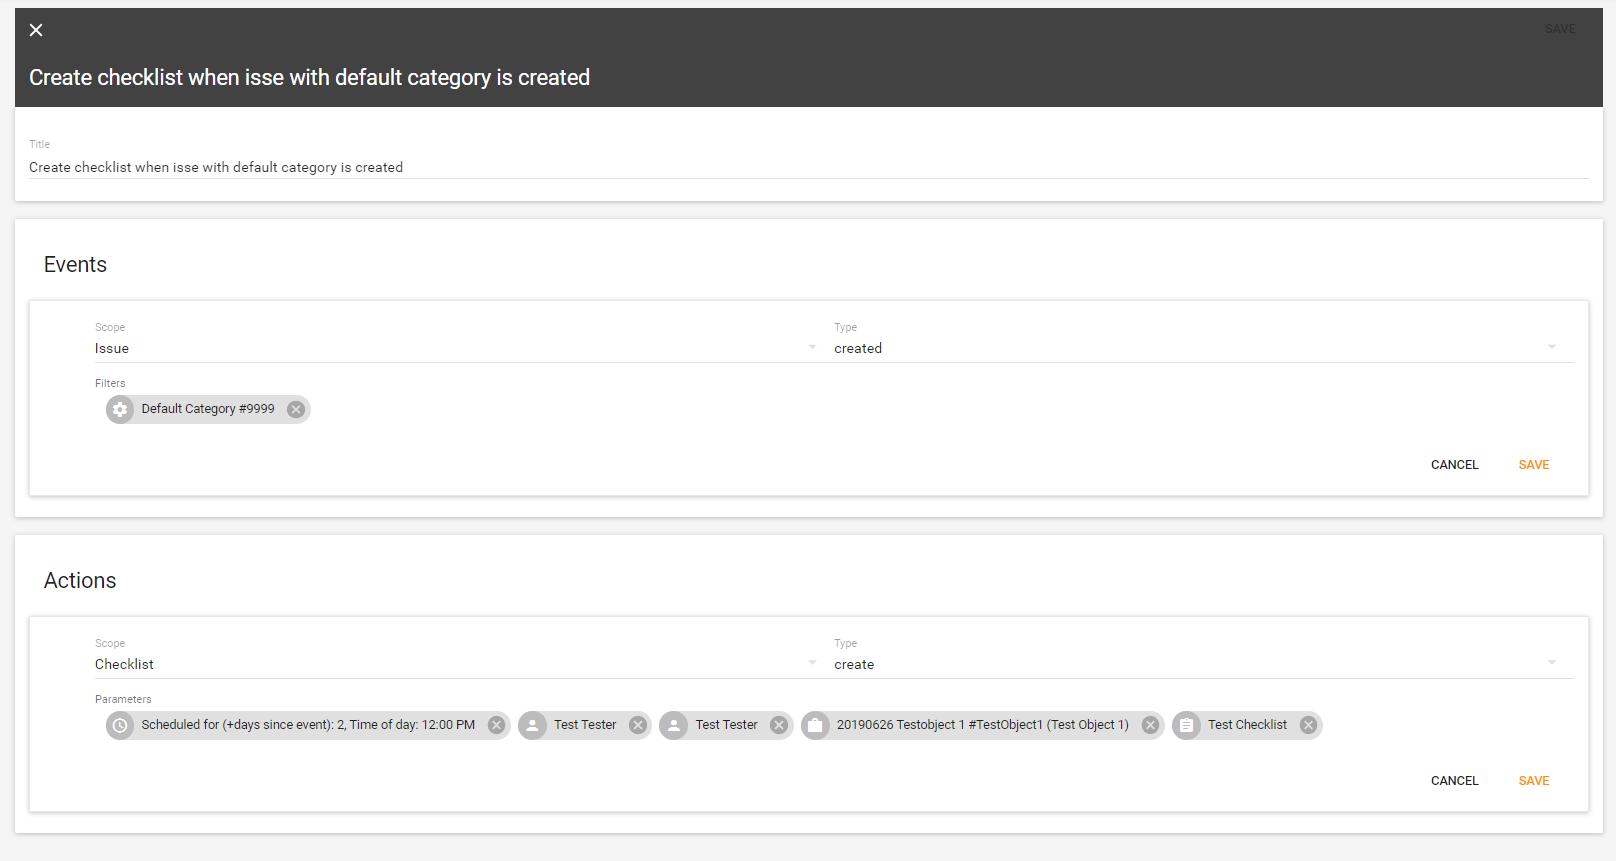
In the “Events” section steps must be defined that must be fulfilled in order to trigger the action. When creating events the following informations have to be specified:
Scope: The scope defines the entity where the event takes place. (Checklist / Issue / Test object / PDF / user)
Type: The type defines the change of the entity. (created / updated)
Filters: Filters can be applied to specifiy the required conditions. Here can be defined that the event is only valid for certain test objects, checklist templates, etc.
When creating actions the following informations have to be specified:
Scope: The scope defines which action should be triggered. (Checklist / Issue / Webhook)
Type: The type defines the change of the entity.
Parameters: Parameters for the triggered action have to be defined here. In this section the values which were already defined above in “Filters” can be reused easily by selecting the “Reuse field value from event” toggle.
Defining all parameters is mandatory in this section. |
Based on events within Testify, webhooks can also be added independently as actions in workflow management. This is possible by selecting the scope "Webhook" with the type "trigger". An URL is to be specified as parameter, optionally an identifier can be entered:


The generation of PDF protocols can now be automated as an action via a workflow. This process automation is to start the generation of PDFs for the filtered checklists. Filters can be set based on the events to define exactly for which check objects or checklists, for example, the automated PDF generation should take place.
As a prerequisite for this automatism, it is necessary to define a corresponding event in advance:
Scope: checklist
Type: changed
Remaining filters as desired
After that the action can be defined:
Scope: PDF
Type: generate
Parameters: Selection of the desired PDF protocol profile and language.


After creation of the workflow it can be edited or disabled/enabled by clicking on the context menu (the three dots) in the upper right corner of the Workflow.
Workflows have a history where all previous steps are displayed. This feature allows to check the successful and failed executions of all workflows. For each execution attempt, a separate entry is created with all relevant information. To ensure transparent troubleshooting, it is also possible to set filters and search for them.
It also shows when a workflow was activated/deactivated and whether this was done automatically or manually by a person.
The workflow history can be viewed by clicking on the context menu (the three dots) in the upper right corner.

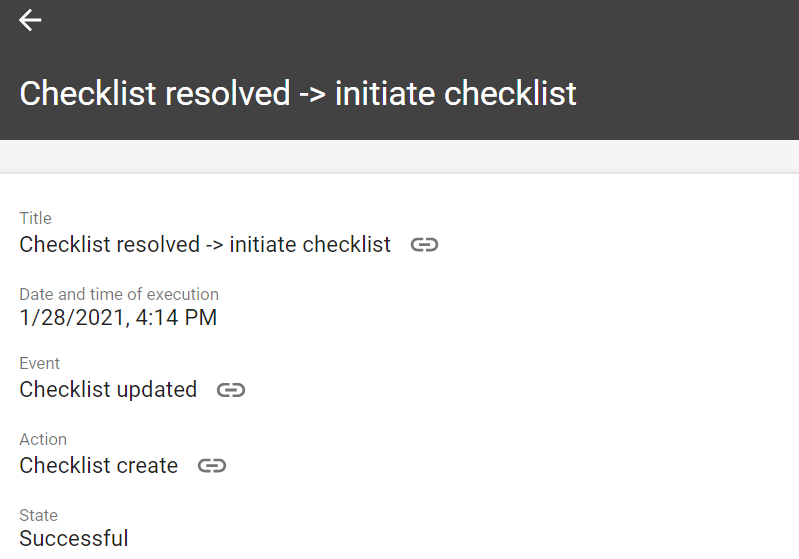
By selecting the desired entry, the history is displayed:

All important information can be seen at a glance. Through the link icon on the right side, the individual points can be expanded and further details can be displayed.
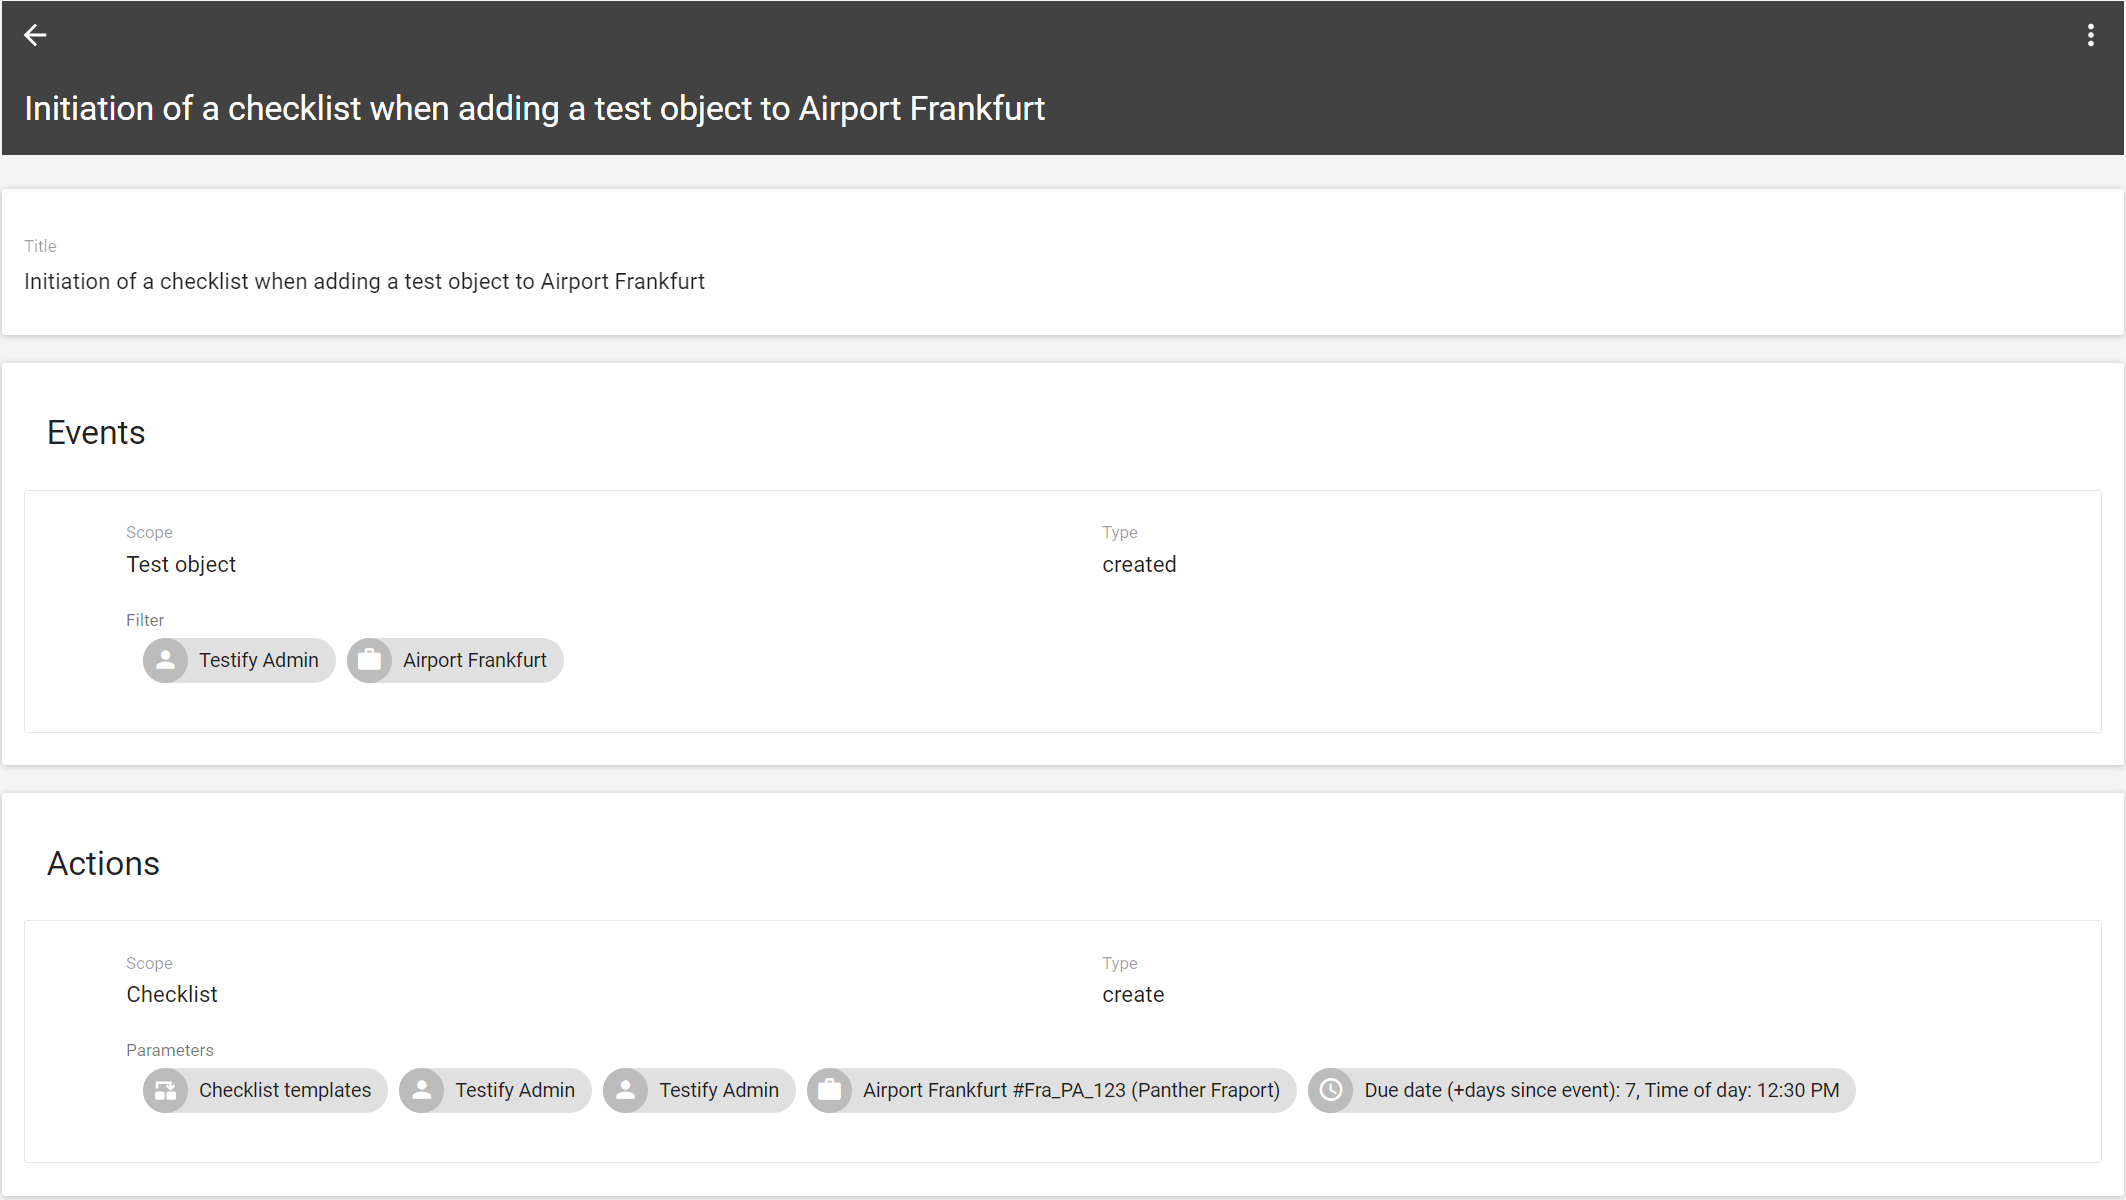
Event:
When a new test object gets added by “Testify Admin“ to “Airport Frankfurt” then the action will be carried out.
Action:
A “New Item - Airport Frankfurt“ checklist gets created for the added test object by “Testify Admin”, assigned to “Engineering”, “Due date (+days since event): 7; Time of day: 12:00pm”.
Event:
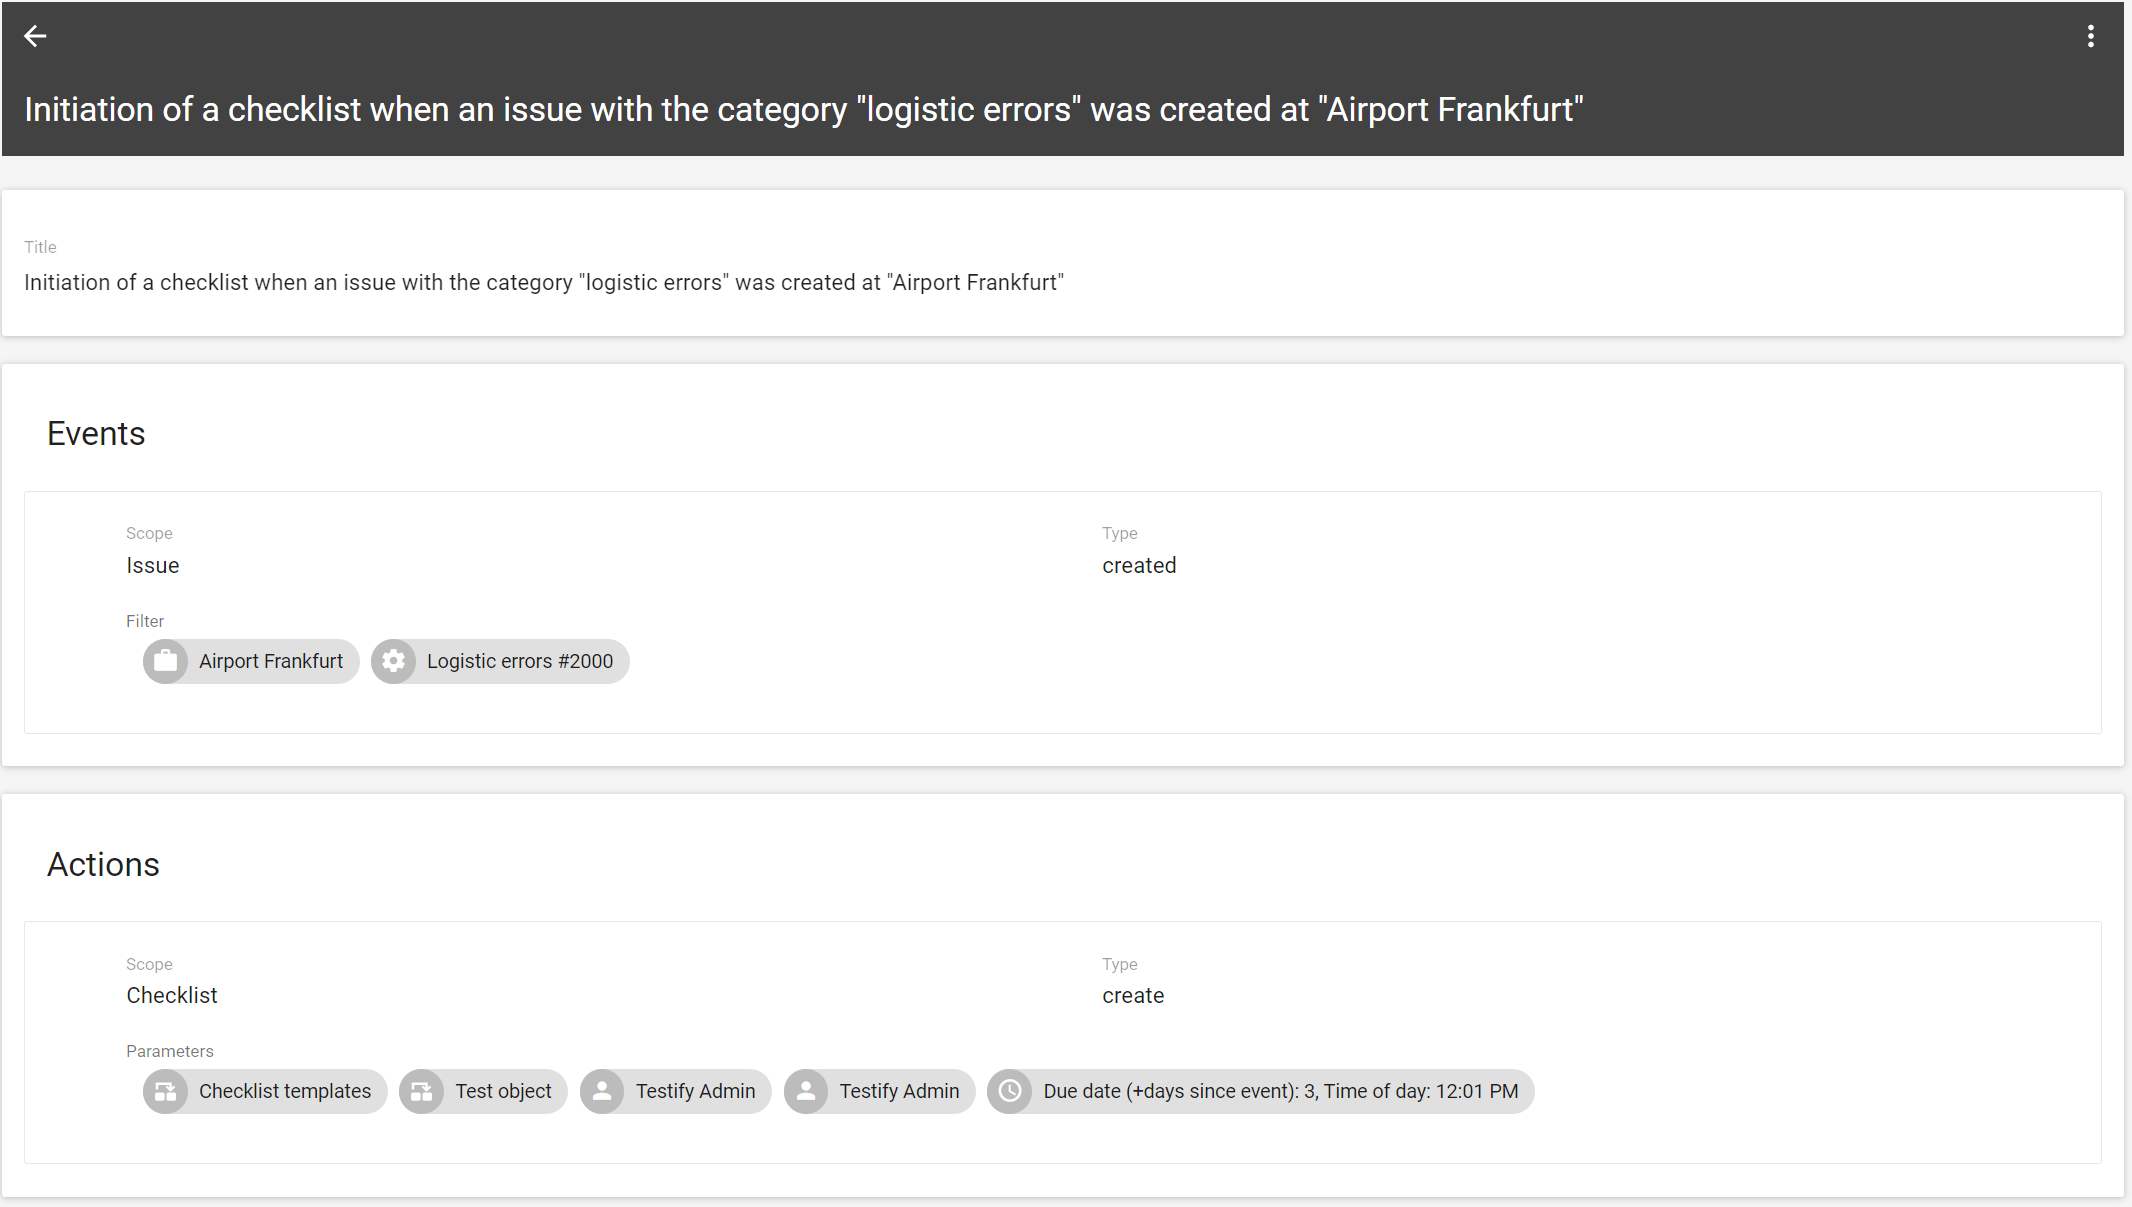
When a new issue with the category “Logistic error“ gets added to “Airport Frankfurt” then the action will be carried out.
Action:
A “Logistic Issue - Checklist“ checklist gets created for the test object where the error occured by “Testify Admin”, assigned to “Engineering”, “Due date (+days since event): 3; Time of day: 12:00pm”.
Event:
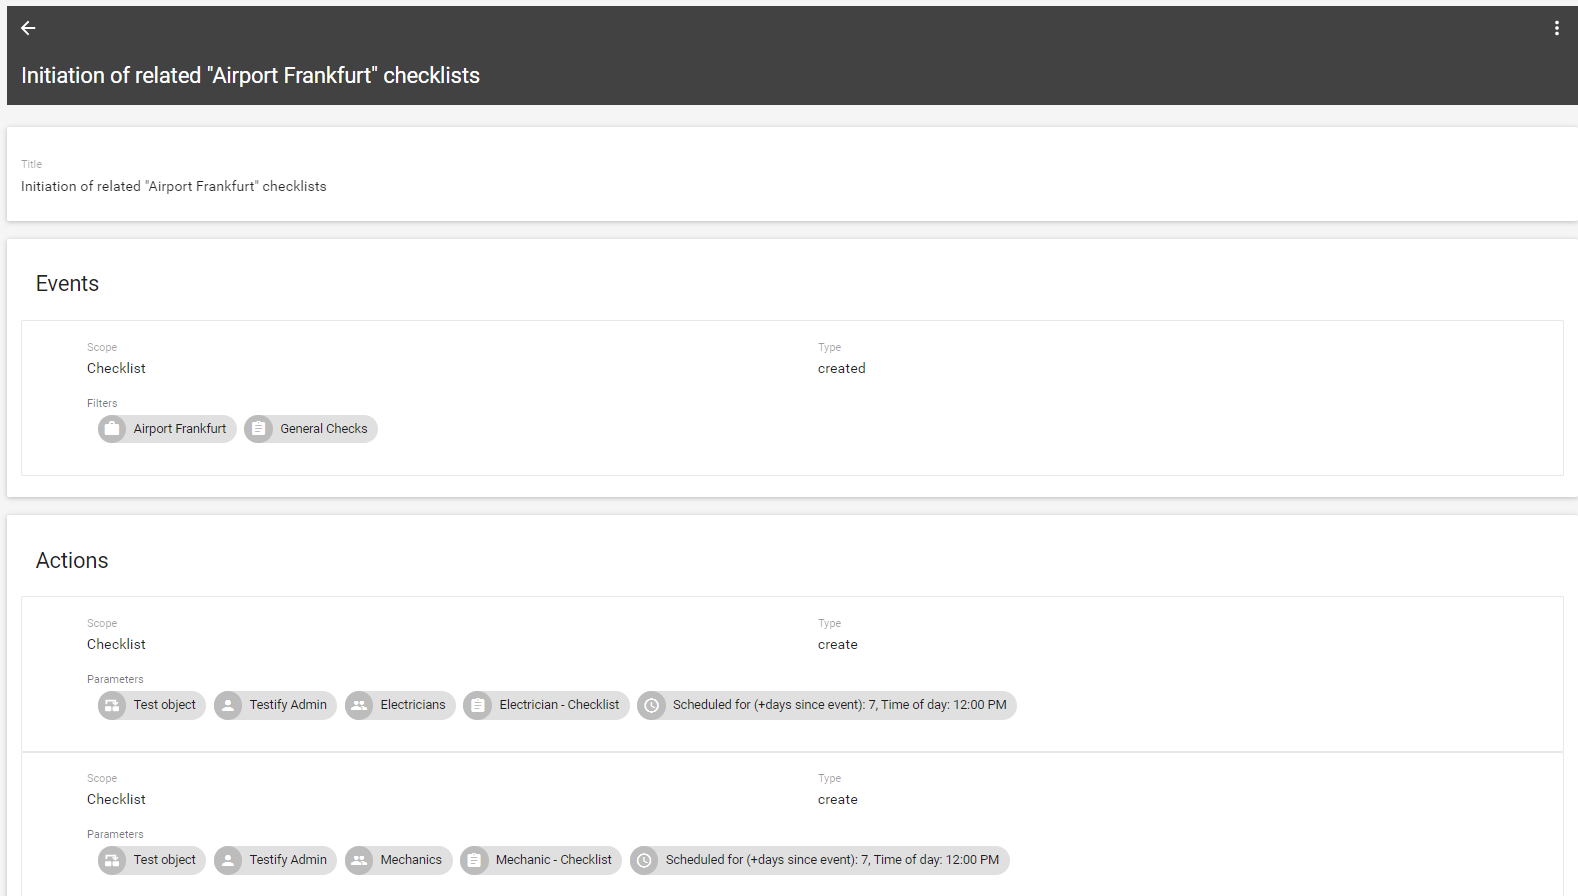
When a “General Checks” checklist get created on a “Airport Frankfurt“ test object then the action will be carried out.
Action:
1) A “Electrician - Checklist“ checklist gets created for the same test object by “Testify Admin”, assigned to “Electricians”, “Due date (+days since event): 7; Time of day: 12:00pm”.
2) A “Mechanics - Checklist“ checklist gets created for the same test object by “Testify Admin”, assigned to “Mechanics”, “Due date (+days since event): 7; Time of day: 12:00pm”.
Event:
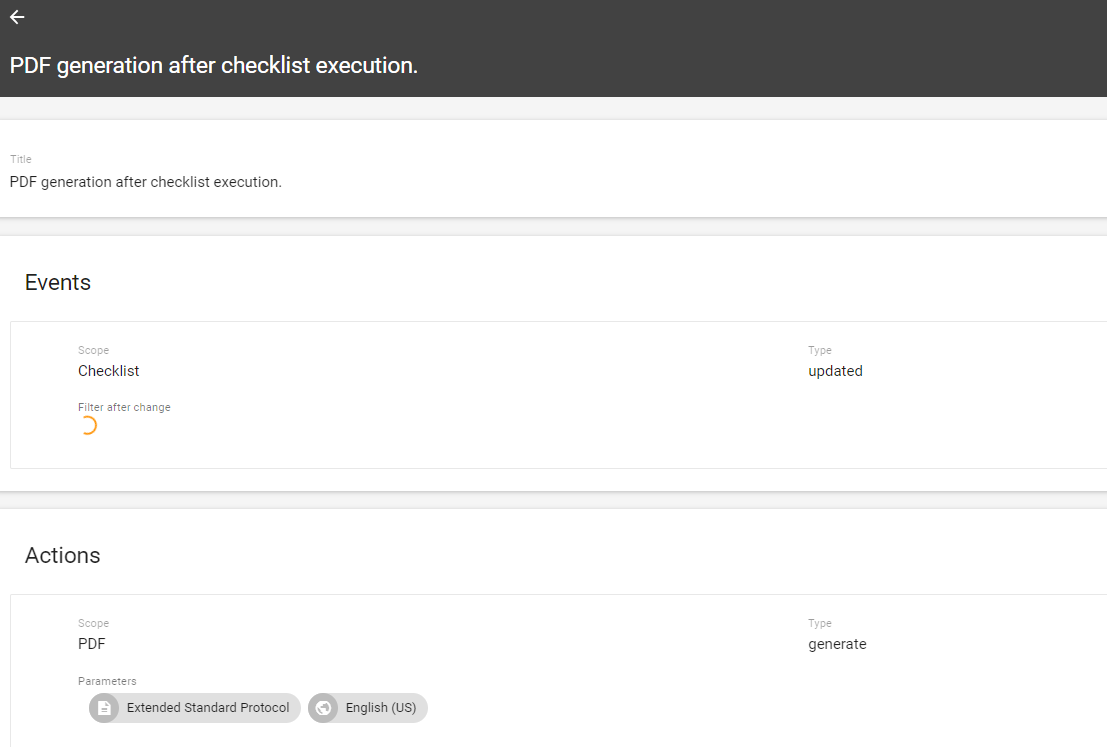
When a checklist is created for a test object "Frankfurt Airport", the action is executed.
Action:
The Extended Standard Protocol is generated the checklist is updated.
PDF protocols can also be automatically stored in external systems. For this purpose, an interface can be built by the customer, based on our webhook, which stores the generated protocols at the desired folder.
Event:
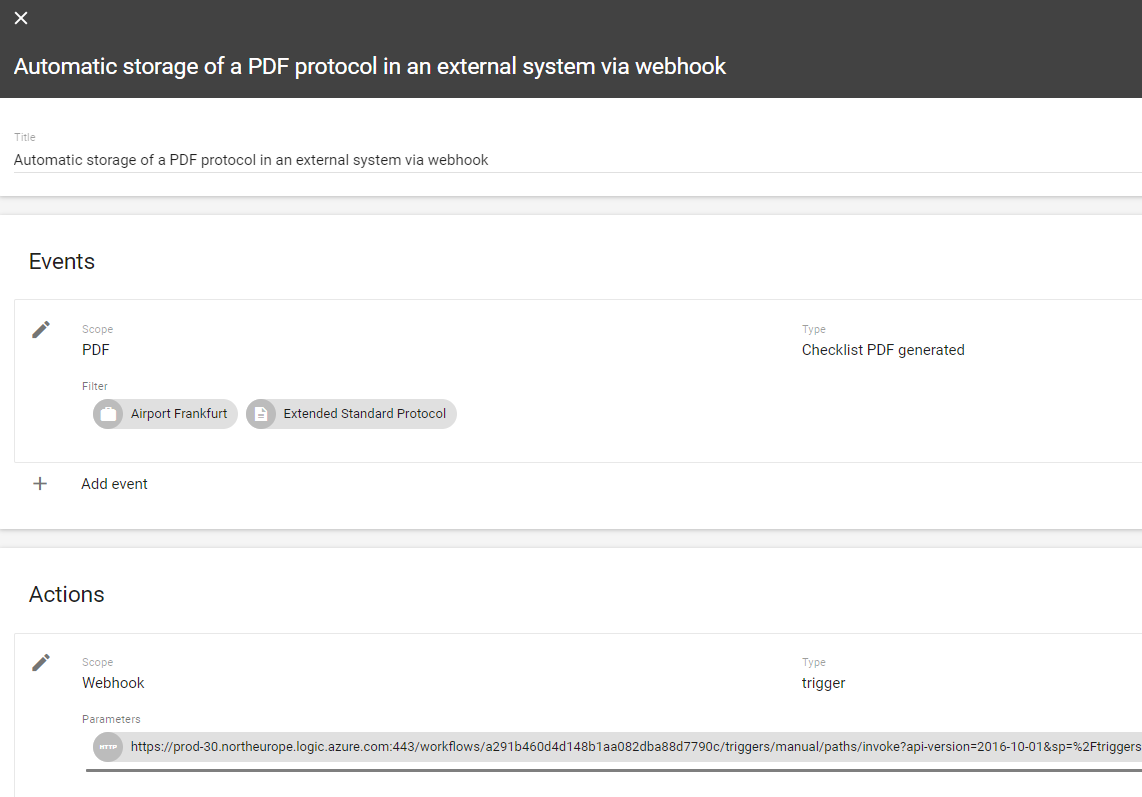
When an extended standard protocol is created for a checklist with the test object "Airport Frankfurt", the action is executed.
Action:
The created PDF protocol is stored in an external system through the interface with the Webhook action.